OLED Display (SSD1306)
Show text on a 0.96″ 128×64 I²C screen: a building block for local, phone‑free output.
Project_10_ESP32_OLED_Display.ino, then open it in the Arduino IDE (setup: Foundation 3). Needs the Adafruit SSD1306 + GFX libraries.
🎯 Objective
By the end of this project, you will:
- Understand what I²C is: a two-wire bus that carries many devices, each with its own address.
- Drive a display through a pair of libraries, one for the chip and one for the graphics.
- Learn the buffer then push pattern every graphical display uses: draw into memory, then send the whole frame at once.
- Check that hardware actually started, and fail with a message that says what to fix.
- Use the SSD1306's built-in scrolling, which runs on the display chip rather than in your sketch.
1 · About the display & I²C
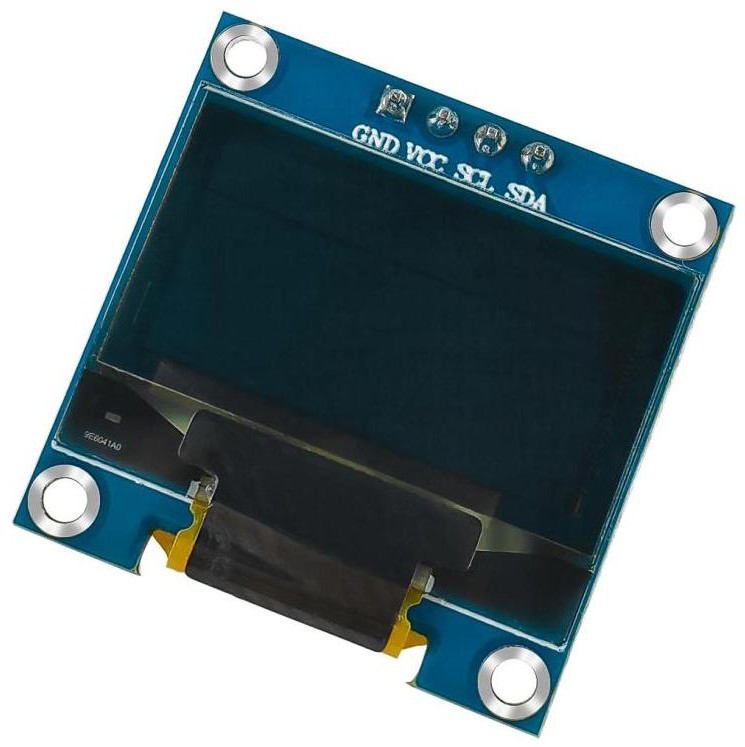
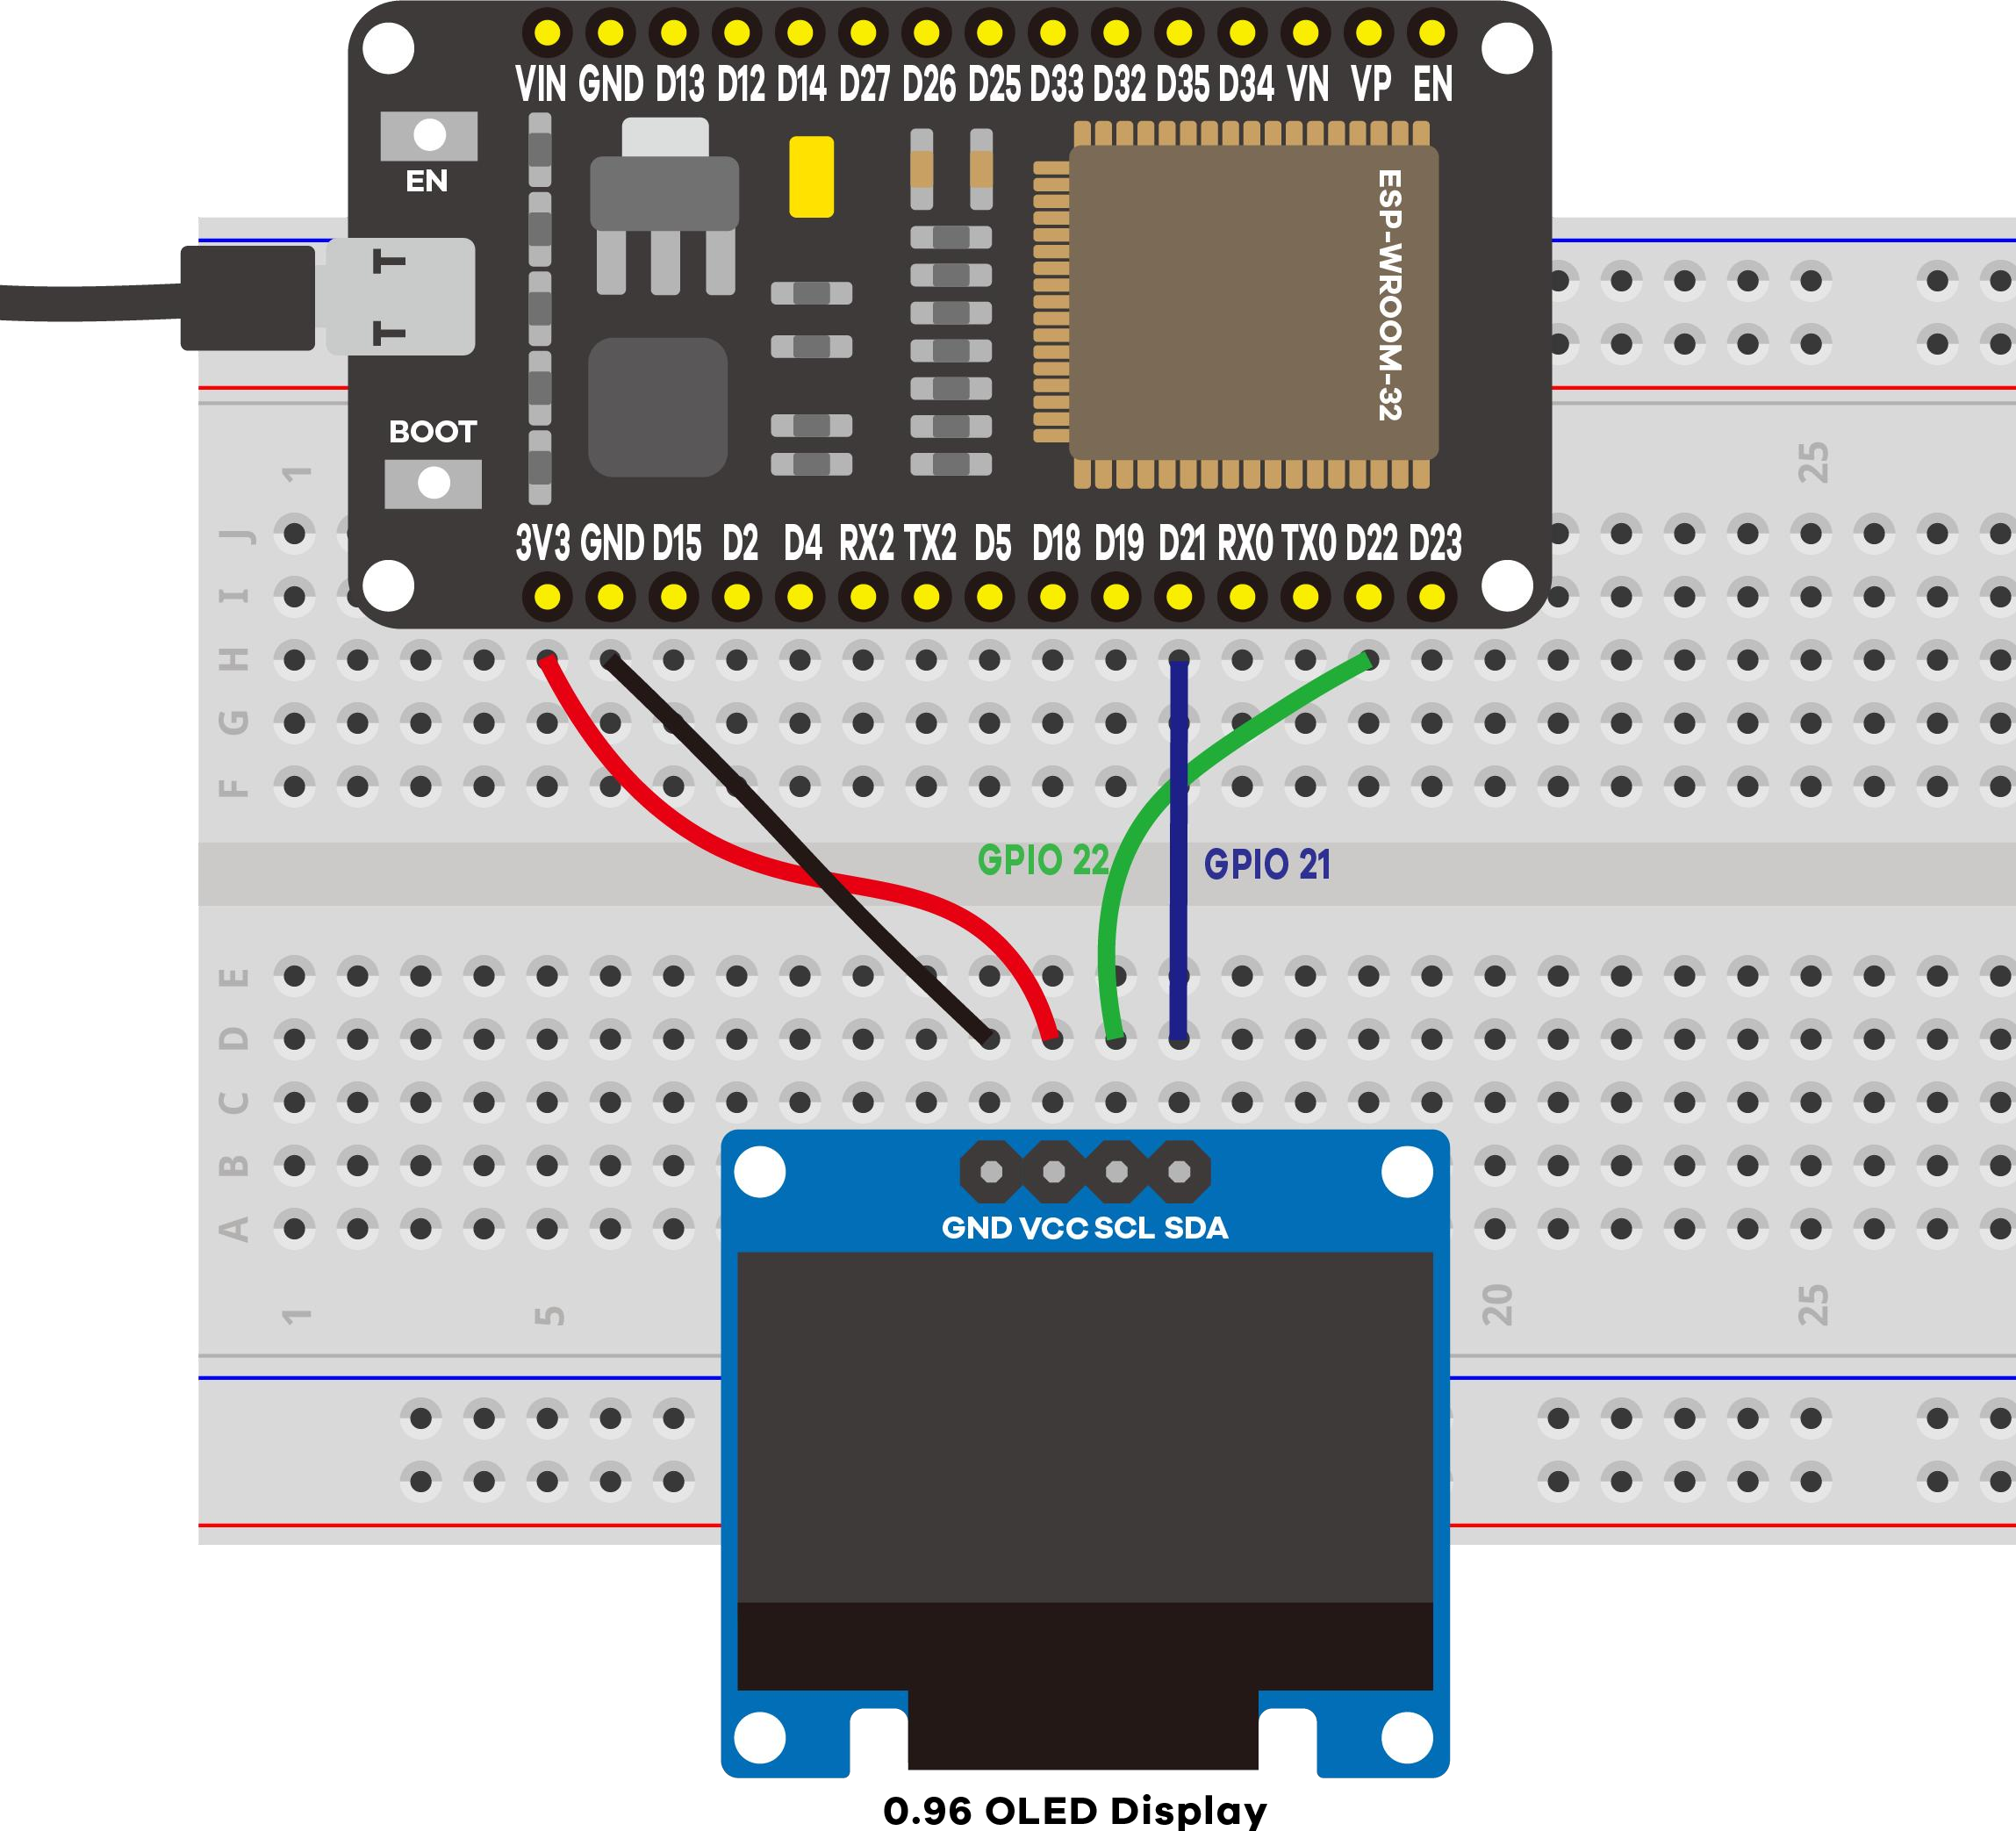
The SSD1306 is a crisp 128×64 monochrome OLED: self‑lit pixels, great contrast, low power. It talks over I²C, a two‑wire bus (SDA + SCL). ESP32 defaults: GPIO 21 (SDA), GPIO 22 (SCL). This module's I²C address is 0x3C.
| OLED pin | ESP32 |
|---|---|
| VCC | 3.3 V |
| GND | GND |
| SCL | GPIO 22 |
| SDA | GPIO 21 |
2 · Install the required libraries
Two Adafruit libraries (both in the Library Manager):
- Adafruit SSD1306 (driver)
- Adafruit GFX (graphics/text engine)
Restart the IDE after installing.
3 · Wiring the Circuit
4 · The drawing API
Clear → set style → position → print → push to the display. Nothing appears until display():
display.clearDisplay();          // erase the buffer
display.setTextSize(2);          // 1 = small ... bigger = larger
display.setTextColor(WHITE);     // white text on black
display.setCursor(0, 30);        // x, y start
display.println("LAFVIN");       // write into the buffer
display.display();               // <-- actually show it
Scrolling is built in: startscrollright(), startscrollleft(), stopscroll().
5 · Code Walkthrough: Understanding the Sketch
Short, but every line is worth understanding: this is the first project that talks to another chip rather than to a plain component.
Step 1: Two libraries and one display object
#include <Adafruit_GFX.h>
#include <Adafruit_SSD1306.h>
#include <Wire.h>

#define SCREEN_WIDTH  128   // OLED width, in pixels
#define SCREEN_HEIGHT 64    // OLED height, in pixels

// I2C OLED, no reset pin (-1). Default I2C address 0x3C.
Adafruit_SSD1306 display(SCREEN_WIDTH, SCREEN_HEIGHT, &Wire, -1);
Three includes, three jobs. Wire.h is the ESP32's I²C driver: it knows how to wiggle SDA and SCL. Adafruit_SSD1306 knows the commands this particular chip understands. Adafruit_GFX is the generic drawing engine: shapes, fonts, cursor handling. That layering is why the println() you already know works on a screen.
The four arguments are width, height, which I²C bus to use (&Wire, the default on GPIO 21 and 22), and a reset pin. This module has none, so that argument is -1.
Step 2: Start the display, and say so if it fails
if(!display.begin(SSD1306_SWITCHCAPVCC, 0x3C)) {
  Serial.println("[OLED] ERROR: display not found!");
  Serial.println("       Check SDA->21, SCL->22, VCC->3V3, GND->GND,");
  Serial.println("       and that the I2C address is 0x3C.");
  for(;;);   // stop here - nothing else to do without a display
}
Serial.println("[OLED] Display initialized OK.");
display.begin() returns false if nothing answers at address 0x3C, which is what a loose wire looks like from the sketch's point of view. Reporting it is the whole difference between "my screen is broken" and "my SDA wire is in the wrong hole".
SSD1306_SWITCHCAPVCC tells the module to generate its own display voltage from the 3.3 V you supplied, using an internal charge pump. for(;;); is an intentional infinite loop: with no display there is nothing useful left to do.
Step 3: Draw into the buffer, then push it to the glass
display.clearDisplay();          // erase the buffer
display.setTextSize(2);          // 1 = small ... bigger numbers = larger
display.setTextColor(WHITE);     // white text on black
display.setCursor(0, 30);        // x, y start position
display.println("LAFVIN");       // write into the buffer
display.display();               // <-- actually show it on screen
The first five calls change nothing on the screen. The library keeps a 128×64 copy of the image in the ESP32's RAM and every drawing call edits that copy. Only display.display() sends it over I²C. Forgetting that last line is the most common OLED mistake, and it looks exactly like a dead screen.
Coordinates start at (0, 0) in the top-left corner, with y growing downward. At text size 2 each character is about 12×16 pixels, so a cursor at (0, 30) lands roughly in the middle of a 64-pixel-tall screen.
Step 4: loop() scrolls, and the display chip does the work
void loop() {
  display.startscrollright(0x00, 0x0F);
  delay(7000);
  display.stopscroll();
  delay(1000);
  display.startscrollleft(0x00, 0x0F);
  delay(7000);
  display.stopscroll();
  delay(1000);
}
startscrollright() is one command sent once. The SSD1306 then scrolls by itself, in hardware, until told to stop, which is why the delay() calls do no damage here: the animation is not being driven by the ESP32 at all. The two arguments are the first and last page to scroll, a page being an 8-pixel-tall band. 0x00 to 0x0F covers the whole screen.
Key concepts: what each line really does
| Code | What it does |
|---|---|
#include <Wire.h> | The I²C driver. It owns SDA (GPIO 21) and SCL (GPIO 22). |
Adafruit_SSD1306 display(W, H, &Wire, -1) | Creates the display object: size, which I²C bus, and no reset pin. |
display.begin(SSD1306_SWITCHCAPVCC, 0x3C) | Wakes the module at I²C address 0x3C and returns false if nothing answers. |
for(;;); | Deliberate infinite loop. Halts the sketch when there is no display to talk to. |
display.clearDisplay() | Blanks the buffer in RAM, not the screen. |
display.setTextSize(2) | Scales the built-in font. 1 is roughly 6×8 pixels per character. |
display.setCursor(0, 30) | Sets where the next text goes. (0, 0) is the top-left corner. |
display.println("LAFVIN") | Writes into the buffer, exactly like Serial.println() writes to the port. |
display.display() | Sends the whole buffer over I²C. Nothing appears without this. |
startscrollright(0x00, 0x0F) | Tells the display chip to scroll pages 0 to 15 on its own, until stopscroll(). |
Expected output on the Serial Monitor
==============================================
 Project 10: ESP32 OLED Display (SSD1306)
==============================================
I2C: SDA = GPIO 21, SCL = GPIO 22, address 0x3C
[OLED] Display initialized OK.
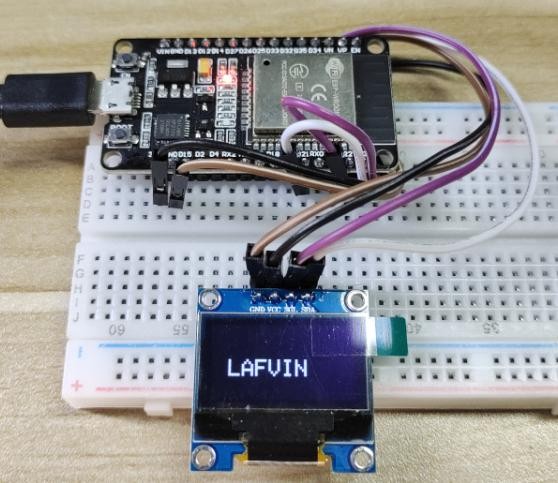
[OLED] Showing text: "LAFVIN" (will scroll).
The improved sketch confirms the display started and prints a wiring/address hint if it can't find the screen (the original just froze silently on failure).
6 · Demonstration
7 · Wrapping Up: What You've Learned
You now have local output: a device that can report for itself, with no phone, no browser, and no network. The key takeaways:
- I²C carries many devices on two shared wires, so each needs an address. This module answers at
0x3C, and adding a second I²C part costs no extra pins. - A display is driven by layers:
Wiremoves bytes,Adafruit_SSD1306speaks the chip's command set,Adafruit_GFXprovides text and shapes. - Graphics work on a buffer. Drawing edits RAM and
display()pushes the frame, which is why a forgottendisplay()looks identical to broken hardware. - Check that hardware started.
if(!display.begin(...))costs three lines and turns a silent freeze into a message naming the wires to inspect. - Some work belongs to the peripheral, not the CPU. Scrolling runs on the SSD1306 itself after a single command.
- This is a building block. Nothing here is tied to the word "LAFVIN": feed it the DHT11 readings from Project 9, the IP address from Project 5, or the motion state from Project 4.
8 · Troubleshooting
| Symptom | Likely cause | Fix |
|---|---|---|
| "display not found" | Wiring or wrong address | SDA→21, SCL→22, VCC→3.3 V, GND→GND; try 0x3D |
| Blank, no serial error | VCC floating | Confirm VCC is 3.3 V |
| Compile error (SSD1306/GFX) | Libraries missing | Install Adafruit SSD1306 and GFX |
| Garbled pixels | Loose I²C wires | Reseat SDA/SCL |